Bonus Homework Week 7
Introduction
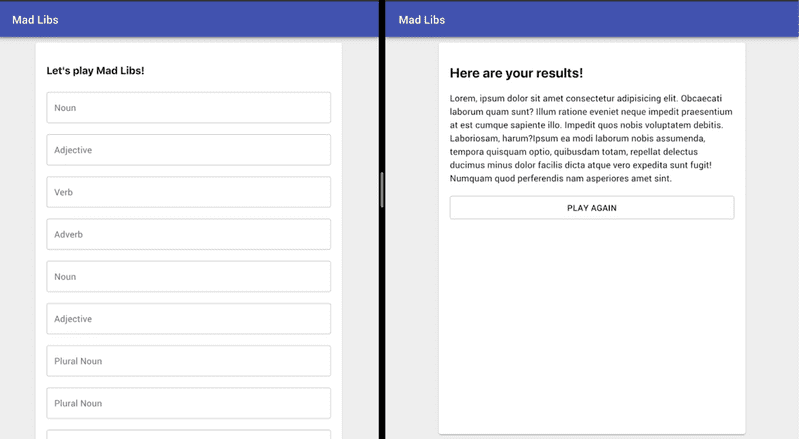
For this week’s bonus homework, we’ll be creating an application that lets a user play the game Mad Libs. The concept is that we’ll ask the user to provide a set of words with a form, and then we’ll create a funny story with those words later!
This will give us a great chance to get started with using a lot of the new functionality that we learned this week with a real project. You can play with my final version of this week’s project here.
Assignment
1) Set up your environment | 10 mins
Before we get started with this week’s homework, we’ll need to create a fresh React application, and install each of the packages that we’ll be using. This week, we’ll be making use of Material UI and React Router, as well as the usual packages that we get with Create React App. I’ll also be using the Axios library this time for data loading, instead of fetch (this ends up being a little easier to work with).
- Open up your command line program to the workspace folder that you’ve been using so far for the course.
- Run
npx create-react-app madlibsto create a new React app for this homework. - Run
cd madlibsto jump into the new directory that we created. -
Run the command
npm install @material-ui/core @material-ui/icons react-router-dom axios- We can add more than one library to our project at once like this, rather than adding everything separately.
- You could also use
yarn add @material-ui/core @material-ui/icons react-router-dom axiosif you prefer yarn to npm.
- Open up the current directory with VS Code by running
code . -
Open a new terminal in VS Code by clicking on
Terminal > New Terminalat the top.- Alternatively, you can press
Ctrl+`to do this with the keyboard.
- Alternatively, you can press
- Type
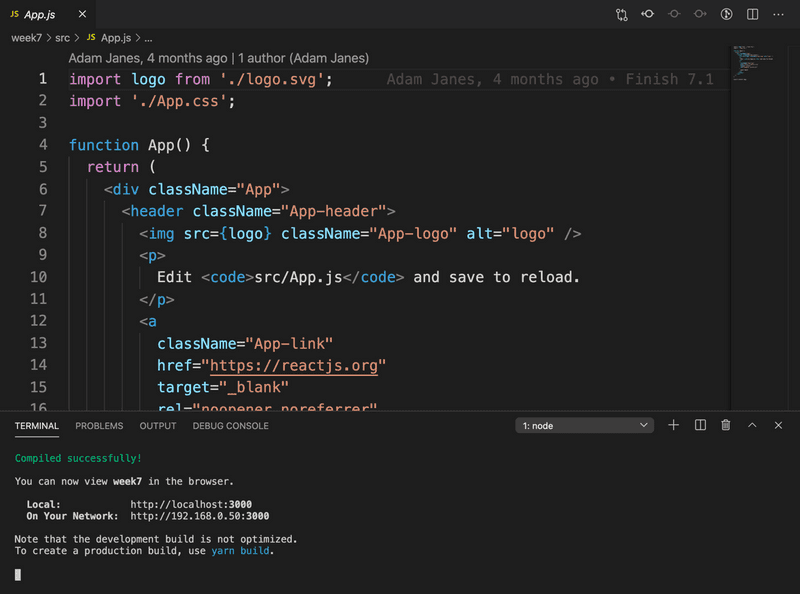
npm start(oryarn start) to set up the development server.
At this point, you should be able to see your app running in the browser!
2) Clean up your new directory | 10 mins
Just to make things a little neater, I would recommend doing a few things as you start off with a new React project.
- Remove the
reportWebVitalscode from index.js, since we’re not using it. - Clear the App component to just read some text of “Hello World”. You can also remove all of the imports that we aren’t using anymore.
-
Create a new folder called
componentsinside of the src directory.- This will store all of the components inside of your app.
- Move the
App.jsfile into the components directory. -
Create a new directory called
contextsinside of the src directory.- This will eventually hold our application store code when we start setting up our context.
-
Delete all of the files that we’re not using.
- This should include
App.css,reportWebVitals.js,logo.svg,App.test.js, andsetupTests.js.
- This should include
In the end, you should have a file structure that looks like this:
3) Give our page some simple styling | 30 mins
I want us to start off by creating some simple nice styling to wrap our app in. I want us to create a nice header to the page, and set up the Material-UI grid system, so that we have some nice gutters around the side of the content.
-
Create an AppBar in the top of the App component. You can use the dummy code here for inspiration from the Material-UI documentation.
- To keep things clean, you might want to factor out this code into a new file called
Header.js, which you can import into your App component.
- To keep things clean, you might want to factor out this code into a new file called
-
Add a Container component underneath the AppBar to hold the content that we’ll put on the page.
- We can use the maxWidth prop here to limit how wide the content ends up being.
- Inside the container, add a Paper element, which should take up the bulk of space of the container, including some margin around the top and bottom.
In the end, you should have something that looks like this:
4) Create a <Form /> component | 45 mins
To start off, you’ll want to create a component called Form, which will hold everything inside of the first page of our app.
- Create a file called
Form.jsinside the components folder. - Inside of
Form.js, make a functional component, and remember to export it. - Render this component from within the
App.jscomponent. -
Inside of this component, we want to create a form which will render one label/input for each blank that we want the user to fill in. To start off with, I just want you to render one label/input, and then we’ll make one for each blank that we’ll be working with in the next step.
At the end, we should have something that looks like this:
5) Load our Mad Libs data | 25 mins
For this project, we’ll be making use of a handy API from Herman Fasset, which generates Mad Libs templates for us (documentation here). Making a GET request to this API gives us some data like this:
{
  "blanks": [
    "foreign country",
    // more blanks...
    "verb"
  ],
  "value": [
    "If you are traveling in ",
    // more lines...
    " in the water!",
    0
  ],
  "title": "How To Cross a Piranha-Infested River"
}
This endpoint gives back an object with a title, an array called value, and an array called blanks. We’ll be using all three of these to create our mad libs app!
Load in the data from your App component, and make it so that we render one TextField for each blank in our data. For my project, I decided to use Axios, rather than Fetch for this.
After this, you should end up with something that looks like this:
6) Make the TextFields controlled components | 20 mins
Now that we have the right number of TextField components rendering to the school, your next step should be to turn each of them into a controlled component. This means that their values should come from component-level state, and whenever a user types something into the input, then that action should update that piece of state.
Hint: One way to do this is to create an object with one property for each row of data. We could then handle a change event using [index]: [event.target.value].
7) Set up React Router so that we have 2 different routes for our app | 20 mina
I want us to come up with 2 different pages for our application, to give us some practice at using React Router.
If the user visits the home route (e.g. just localhost:3000), then they should see the form page that we’ve created already.
If the user visits the /results route, they should see the last generated results from their app. You should also include a button to direct the user to play again, which should direct them back to the form page.
For now, I just want you to have some dummy text where the eventual result text will end up:
8) Make a Context to store application state data | 45 mins
Now that we have our form working as we want it to, we’ll need a way of storing some values at the application state level, so that we can pass information between our two screens.
Create a file in your contexts folder called TextContext.js, which should store the text that we’re generating in our form component. You’ll need to wire this up so that we have a Provider component that contains the whole application, and then you’ll also want to use React.useContext() in your Form component to get a hold of the values of this global piece of state.
- Wire up a context that you can access from your Form and Results component.
- In your Form component, create a function that will take the form results and the value array from the API data, and stitch together one string of text from it (you might find the
Array.reducemethod useful for this!). - When the user clicks the “Create Mad Lib” button at the bottom of the Form component, this should set the value of the text in the TextContext (global state).
- Make a redirect to the results page using the
history.push()pattern of react router once the text has been set. - Change the results page to show whatever the value of the text is from TextContext. You can also pass through a title to the results page from the App component (the title is included as a property on the data object that we get back from the server).
9) Final Touches | 30 mins
I want us to make a few more tiny fixes to our app, so that everything looks nice.
- Add a Link to the “Play Again” button on the results page, which takes the user back to the form.
- At the moment, when the user goes to the results screen before submitting the form, they just get a blank page. Add an
if/elsecondition which prompts the user to fill out the form first if the text variable is empty. - There is a slight delay at the moment when the page loads up for the first time. This is because the page has to wait for the server to give back a response, including the blanks that should be rendered to the screen, before it can show anything inside the Form component.
- I want you to add a loading spinner, which will be shown if the data is still empty. There is an element from Material-UI called Circular Progress, which creates an element that you can use for this!
10) Deploy your app! (optional) | 20 mins
As a last step, you might want to actually deploy your app to a server, to see how that whole process works! An easy way to do this with projects like these is to use Surge, which also comes with an npm package. This allows us to host static web pages for free, in quite an easy way!
- Install surge globally using npm from your command line (
npm install -g surge). -
Navigate inside your mad libs project directory, and run the command
npm build.- This bundles up all the react code in your project to a single HTML file.
- This creates a new file in your project folder called build, which you can run without a server.
-
Run the command
surge buildto host these files on a random domain. This should give you back a website at surge.sh containing your static web page!- If you see output like
“Aborted - you do not have permission to publish to seemly-reward.surge.sh”, then just run the command again. This means that somebody else already has an app at the random domain that was generated for you.
- If you see output like
11) Watch/read the following materials | 1 hour 40 mins
Both of this week’s bonus resources are from Dan Abramov - the creator of Redux. Redux is one of the most common libraries to handle application-level state (which we handled with the React Context API).
The second article is fantastic - showing how it’s possible to be a truly world-changing developer, despite not totally understanding how absolutely everything works!


